


Linocut & Woodcut
Information about linoleum print & woodcut
Linocut is one of the many artistic techniques of relief printing in which only the raised lines and surfaces on the printing plate are imprinted on a paper or fabric. The oldest form of this type of printing is the woodcut. After linoleum was invented as a floor covering back in the 1850s, it was quickly discovered that it was also an inexpensive and easy-to-cut material that could be used for artistic purposes as well and subsequently was used more and more as an alternative to the much more difficult to work with wood. Because the linocut technique is easy to learn and allows the practitioner to make beautiful prints out of even the simplest pictorial forms, this technique is also great for use by children (makes them look good!).
The linocut technique is made up of two steps: the cutting and the printing.
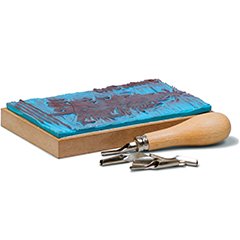
The materials necessary for such jobs include a linoleum sheet (e.g. DLW linoleum sheets) that is at least 3 mm thick and the proper cutting tools, which consist of differently shaped knife blades (including chisels or gouges – see: DLW LINOCUT tool kit). In order to safely work on a linoleum sheet with these tools we highly recommend that you employ a work board with two corner mouldings against which the linoleum sheet can be fixed in place and thereby prevented from sliding away during the work (LINOCUIT SAFETY CUTTING BOARD). In addition, all cutting work with the tools should be done in a direction away from your body. When cutting a motif, you must always keep in mind that when printed it will subsequently appear on the paper as a mirror-inverted image. This peculiarity must of course be especially taken into account when cutting numbers and letters. When completed, the cut linoleum sheet is called the printing block. This must be carefully washed with soap and water or denatured alcohol and allowed to dry in order to make sure that any skin oils that may have gotten on the linoleum during cutting will be removed and the ink of the next step will adhere successfully.
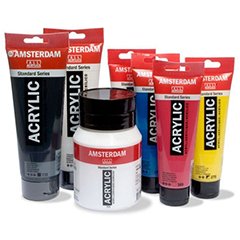
The printing process begins, of course, with the application of the appropriate colour ink to the printing block. For this you will need an inking roller and a smooth surfaced sheet (e.g. POLYSTYRENE or glass) upon which you can first roll the roller in order to assure a nice thin coat of ink remains on it before you apply the roller to the printing block. For beginners, the right ink to use is probably a paste-like version that is water based and therefore easy to wash off of the tools and equipment when needed (e.g. MARABU Aqua LINOCUT ink). CHANGE “COLOUR” in the name AS WELL AS LEAVE OUT “PRINTING” IN OLD VERSION in shop Printing can be done on basic drawing paper or cardboard; especially good results can be achieved on absorbent paper like Japan or China paper, e.g. WENZHOU chinese rice paperor the Vang linoprint paper pad. With the appropriate ink (e.g. MARABU Textil fabric paint) you can also make prints on washable fabrics.
One of many different techniques for making a print consists of taking the intended sheet of paper (or similar) and simply laying it on top of the inked printing block and gently pressing. For the final step, a folding bone, a PRESSURE ROLLER or a clean inking roller can be used. Once this process is completed, the paper should be carefully removed from the printing block. The printing block can be cleaned and reused any number of times. The inevitable differences in the thickness of the ink coat and the pressure used for application end up producing what is a unique copy each time.